|
|
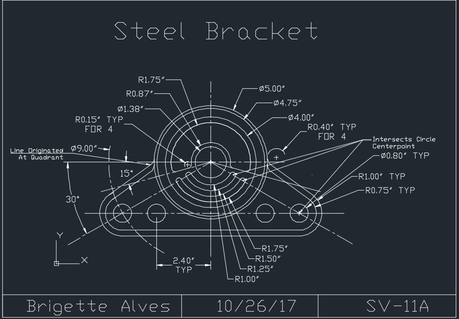
These were the very first drawings I did on Auto Cadd. I used simple commands and primarily used lines and circles. These are called SV drawings also known as single view drawings.
|
|
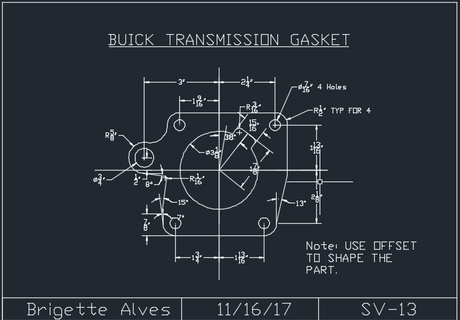
These SV drawings were a little more difficult to conquer. We learned how to use the mirror command to reflect part of the image to the other side to decrease the work time. We also learned the fillet command. To make the drawings easier to complete, the fillet command was used to fill in gaps of space with a partial circle. The fillet command was used instead of tan- tan radius, which required a little more time to use to create partial circles.
|
|
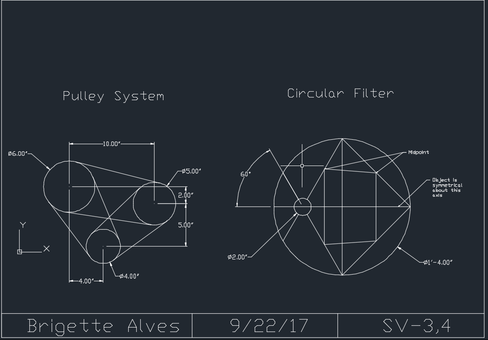
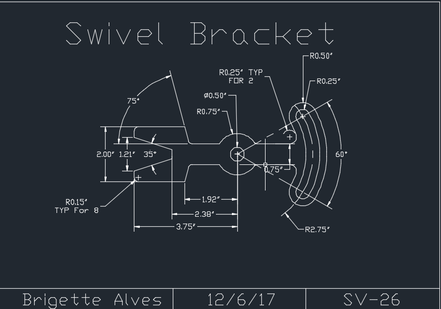
These SV drawings were a little more challenging. We started to use angles from the coordinate plane to find the location of circles and lines. We begun to realize that there was a lot more to Auto Cadd then we thought.
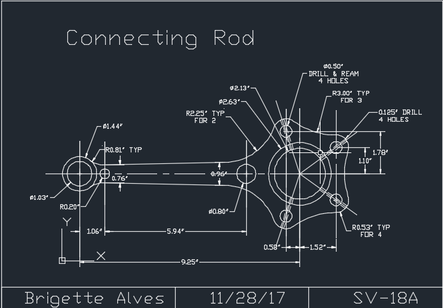
The drawing above posed a problem for me because we had to use the fillet command throughout the entire drawing. The fillet command is a very difficult command to use because you need to know several pieces of information to use it.
|
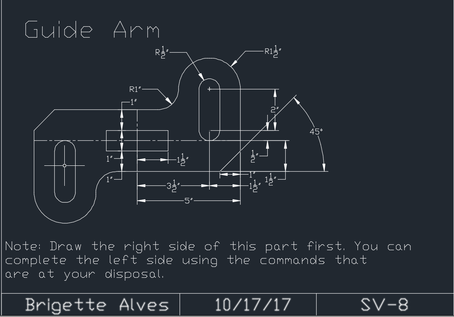
This drawing was also challenging because of the large amount of curved lines of the right side of the drawing. This drawing was also the SV test, so we only had one period to complete it and turn it in to Mr. Kalif.
|
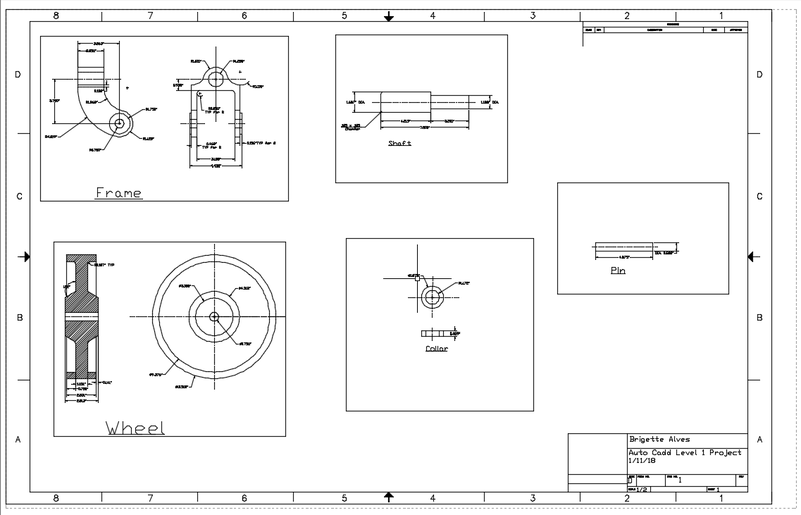
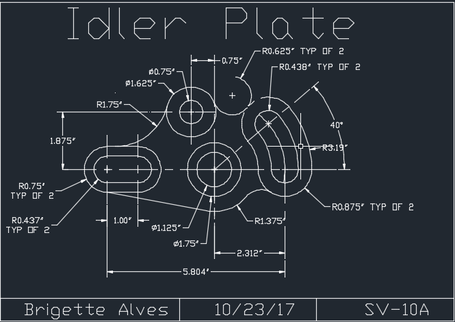
These five drawings were all part of the level one project. For this project, all of the level one students had to draw the individual parts separately. Then we created a paper space drawing and added m- view windows on the drawing. The paper space drawing is the white background and border. The m- view windows are the 5 boxes in the paper space. They show a certain part of individual drawings that we want someone to see. This project was worth 600 points and required a presentation to the class.
